Nexus (NPM)
3 Easy Steps
Teams using Sonatype Nexus can manage access to NES packages through 3 easy steps:
- Create a Proxy Repository (
NES Remote Repository) for our private NPM registry. - Configure the Proxy Repository with a Routing Rule
- Configure a Group Repository to access both NES and OSS packages.
Important
This Group Repository is mandatory as a misconfiguration will lead to Nexus seeking all NPM packages from us. Failure to configure this correctly may result in suspension of your access token.
Step 1: Create a Proxy Repository
- Navigate to
Server Administration and Config>Repositories
- Select
Create Repository, then selectNPM (proxy)as the recipe.
- Provide the following configuration values on the Create Repository page.
For configuration values not defined below, use the default value that Nexus provides.
Name npm-registry Remote Storage https://registry.npmjs.org/ Blob Store provide the appropriate store for your environment - Create the repository.
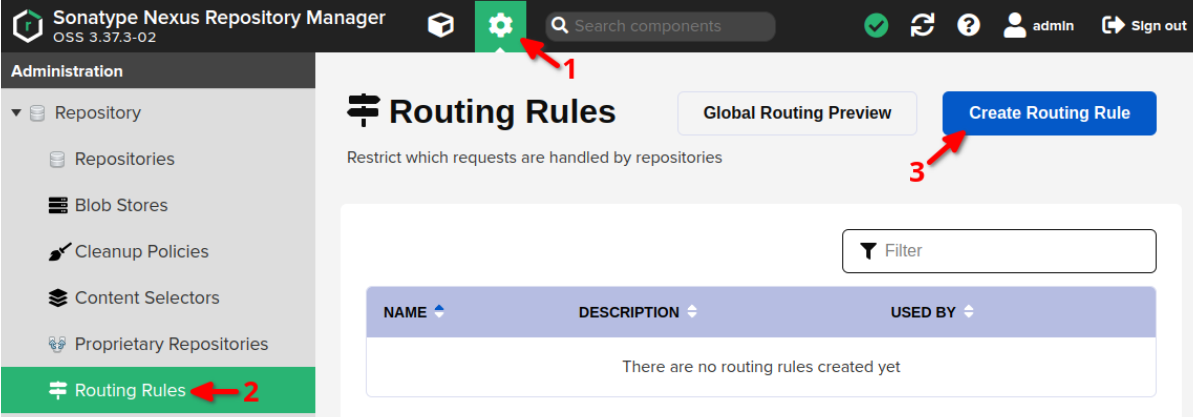
Step 2: Create a Routing Rule
- Navigate to
Server Administration and Config>Routing Rules - Select
Create Routing Rule
- Provide the following configuration values on the Create Routing Rule page.
For configuration values not defined below, use the default value that Nexus provides.
Name neverendingsupport Description Route NES requests to HeroDevs registry Mode Allow Matchers ^/@neverendingsupport/.* - Create the Routing Rule
Step 3: Create a NES Proxy Repository & Group Repository for your team
First, create a NES Proxy Repository which will handle only the NES packages requested.
- Navigate to
Server Administration and Config>Repositories
- Select
Create Repository, then selectNPM (proxy)as the recipe.
- Provide the following configuration values on the Create Repository page.
For configuration values not defined below, use the default value that Nexus provides.
Name nes-registry Remote Storage https://registry.nes.herodevs.com/npm/pkg Blob Store provide the appropriate store for your environment Routing Rule neverendingsupport (from Step 2) Authentication checked Authentication Type Preemptive Bearer Token Username nexus Password <NES_ACCESS_TOKEN> - Create the repository.
Next, create a Group Repository for your team so that they can access both NES and public packages from a single remote repository.
- Navigate to
Server Administration and Config>Repositories
- Select
Create Repository, but this time selectNPM (group)as the recipe.
- Provide the following configuration values on the Create Repository page.
For configuration values not defined below, use the default value that Nexus provides.
Name npm-global Blob Store provide the appropriate store for your environment Members npm-registry, nes-registry - Create the repository.
Configuring your NPM client
Review the Nexus .npmrc documentation or npm client authentication documentation to setup your project or npm client accordingly. Nexus supports two authentication methods for the npm client:
Here is an example of what an .npmrc file should look like using the Realm and Login method:
registry=https://<NEXUS_DNS>/repository/npm-global/
email=<USER_EMAIL>
always-auth=true
_authToken=NpmToken.XXXXXXXX-XXXX-XXXX-XXXX-XXXXXXXXXXXX
Here is an example of what an .npmrc file should look like using the Basic Auth method:
registry=https://<NEXUS_DNS>/repository/npm-global/
email=<USER_EMAIL>
always-auth=true
_auth=<BASE64_ENCODED_CREDENTIALS>
Replace each of the following placeholder values:
- NEXUS_DNS - The domain that the Nexus instance is reachable at.
- USER_EMAIL - The email address of the user authenticating against the Nexus repository.
- BASE64_ENCODED_CREDENTIALS - The base64 encoded username and password of the Nexus user. This is not provided by HeroDevs, and the string should be the base64 encoded value of “username:password”.
Note
When using the Realm and Login method, the _authToken will get written to the .npmrc file at the root of the user’s home directory. That token can be copied and then instead added to an .npmrc file in the format shown above.